Difference between revisions of "CatalogIt Quick Tips"
Jump to navigation
Jump to search
| Line 7: | Line 7: | ||
* Click on the + button in the upper right to create your Tags. | * Click on the + button in the upper right to create your Tags. | ||
| − | Once you've created them here they will be available to you when you are creating or editing an Entry. | + | Once you've created them here they will be available to you when you are creating or editing an Entry.[[File:Tags profile field in Edit Entry.png|thumb]] |
| − | |||
| − | [[File:Tags profile field in Edit Entry.png|thumb]] | ||
== De-duplicating and Consolidating Profiles == | == De-duplicating and Consolidating Profiles == | ||
Revision as of 21:06, 7 September 2019
Creating Tags
Tags are a special class of Profile that can be thought of as "post-it" notes which you can attach to your Entries. Some useful tags might be, "Needs more photos" or "Needs dimensions."
To create your Tags, follow these steps:
- From the Main Menu (the three horizontal bars in the upper left) select "Profiles"
- Select the "Tags" icon
- Click on the + button in the upper right to create your Tags.
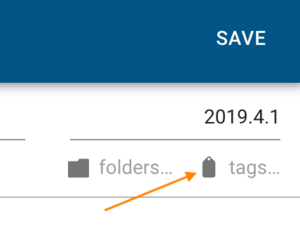
Once you've created them here they will be available to you when you are creating or editing an Entry.
De-duplicating and Consolidating Profiles
It is very common to have multiple Profiles (i.e Person or Place) that represent the same entity but have different spellings and need to be consolidated into a single representation. The "Replace" feature is designed to de-duplicate and consolidate multiple Profiles into a single Profile.
From the appropriate Profile list page:
- click and view the Profile you want to eliminate
- select Replace from the "Actions" menu
- find and select the replacement Profile and click Replace
- edit and delete the unwanted Profile
Here's a quick video that shows the entire process:
Downloading your Original Image
blah blah blah
